Sunday, March 3, 2019

Slow getting started again

Its been a while since I posted here.  Sorry, I have 15 million interests and it takes a while to get back into the swing of things sometime.

So, on to the Romulan Warbird.

As you know I drilled out the engine section, then I light blocked and primed it.  Maybe drilling out the holes first was not such a good idea, I ended up re-drilling them just to clear them of paint!  Wow that was annoying.  So I ended up light blocking and priming all the parts.


Before I drill any more holes, I am going to put the basic color onto this bird.

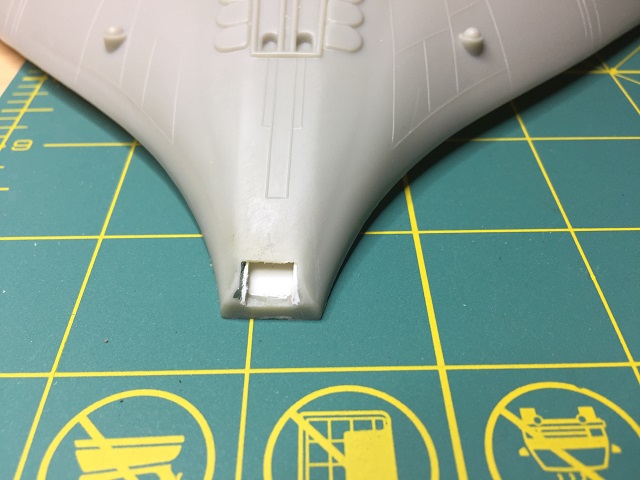
But before I do that, let me tell you another of my decision.  I call it, Keep It Simple Stupid! (kiss).  One of my issues is I decide to bite off more than I can chew.  So, instead of the rework of the inside cargo area, and a lot of the extra. I'm going to leave it alone.  Looking at the top image, the only thing I want to add are the two bits under the cargo doors, it does look bare.

So the plan now is to get this thing painted, built, touched up and finished without really any more mods.  I do have a large number of models I want to build,  and I told the wife if she let me buy this I would build it next.


I hunted around the hobby shops around were I live for supplies.  Gosh, its hard to find any now a days.  We took a trip to the USA just recently and found the following,  Made me very happy.


So that's the update, for now.  Going to work on that cargo door area today.

Laters


Tuesday, January 29, 2019

Busy With Dinner Theater

Sorry I have not posted any updates for a couple of weeks.

I have been working on the warbird, but currently don’t feel it’s enough to post about.

Plus, I am involved with our local Dinner Threater Company and we are currently doing our shows and then we are done until next year.

I promise as soon as the first week of February is over I’ll get back to regular postings.

Thanks

Sunday, January 6, 2019

A New Year and Backend Windows

Happy New Year everyone, hope you had a memorable celebration.


But now its over and on with the build.

Well, I had hopped to get more done today but I didn't, I wanted to shape the plexiglass for the engine, but I have misplaced the plexiglass. So I have to go into town and get some more. Do that tomorrow.

I drilled the holes into the back section of the ship.  And I have a couple of lessons learned. 

1) Practice Drilling!  I can't state this enough.  You think drilling simple little holes is well, 'simple', bits not.

2) Figure out the correct size bit while practicing.  The saves the embarrassment of realizing the holes are the wrong site and should be smaller.

3) Create Proper templates.  I thought paper would be ok.  Its not really a good solution for drill templates.  At least not with this many holes to drill.

4) Use the appropriate drill.  The slowest the drill I used still was at 1000 rpm.  Think I will see if I can something to slow it down a bit more.

Here is my drilling setup, and yup that's a magnifier in front.  I was going cross-eyed trying to see what I was doing with my naked eyes.


So, with the wrong size bit, a too fast drill and lousy templates, I drilled the backend out.  Once I realized my error, I just decided to continue and live the my mistake.    I don't think it turned out that bad in the end.

There are not the same quantity of windows and they are a little over the place. But hey, they are Drilled!

As I said before, I was going to do the engine, but I cannot find my plexiglas.

On a side note, the forum that I am on had an interesting post on my thread.  It featured an interview with Andrew Probert on Trekyards.  Its worth a watch if you have not seen it.


One of the items Mr. Probert mentions is the inboard cargo area.  Now I knew it was different, but did not realize how different.  Basically the cargo area was designed to stretch to the back of the ship.  Instead it was shorten into what we see in todays model.

So seeing as I am making mods, making this my own, I wonder if I should build the model as created, or stay true to Mr. Probert's design and build up the cargo area.  Ah, decisions... decisions... decisions...


Sunday, December 30, 2018

Impulse Engine


One of the other mods I want to do is add an impulse engine.  In one of my earlier posts I had included an image made by Andrew Probert.  In that image he indicates "Impulse engines should be in a vertical slot from just below the shuttlebay wrapping around to a similar spot underneath."

The image below shows the planned cutout, I think I will look good.


The following image shows the impulse engine slot cut out.  One thing of note is by cutting this section out, I am actually cutting one of the location pins used in assembly,  so I glued a piece of plastic to act as location pin, but to also act as a light block from the rest of the back section.


You can see here the slot, I think its going to be good.  Someplace around this place I have a scrap piece of plexiglass. I am planning on cutting a piece out that will fill this slot, I may have to shim with plastic, but once lit, I think it would be looking excellent.  Which brings up a question, what color should the impulse be for Romulan Ships?  I've seen yellow, not sure, what do you guys think?


I am going to be putting the windows into the sides of this thing soon.  One method I saw was to use a template, sounds like a brilliant idea. 

That's all for now, have to make dill templates, maybe I can get the holes before I party tomorrow night.

You all have a Happy New Years!


Christmas Present

Well, Christmas is over and I wanted to share one of my presents I got this year.  This is from my thoughtful wife.

Its a portable spray paint booth..


And Fully open


From what I gather, I can hook two of these together and get a double wide booth.  May have to look into that sometime in the future.

But for now, I really need to learn to use an Airbrush, I no longer have an excuse!


Tuesday, December 25, 2018

Romulan Warbird Shuttle Bay

Just a quick and short update seeing as it is Christamas day, but I have done the shuttle bay.  I personally think it looks better.  Here is what it looked like stock.


and the following two pictures are my changes


I will be putting some translucent plastic to diffuse the light into the hanger, but I will add that after I did some painting.  I thought about putting a cover over the opening, like a roof, but it looks good as it is, but who knows what I will do between now and then.

One odd ball thing I am thinking about, is making a tiny tiny shuttle to put into here.  Probably just a blob of plastic, but if I can make it look about right, I just might do that.


That's all today,  have to do the Christmas thing now.  

Merry Christamas one and all.


Sunday, December 23, 2018

First Model being built

I have decided to start getting back into model building by building the old AMT D’deridex Romulan Warbird.  Unfortunately I have not seen a recent repop of this kit, but you can still find them on the popular auction sites.


My plan is to build and light this model.  If you search the web there are a few good tutorials on building this beast. An example can be found here.

I am planning on making some modifications as I put together this model.  Some of them screen accurate and others because I think it looks cool.

First, making part of this model more screen accurate.  One of the biggest glaring inaccuracies of the model is the cargo bay areas.  On the AMT model, the bay doors are in the roof and there are no details below the bay openings.


The image below is from Christie’s Auction and you can see the obvious inconsistency.


While researching this ship, I also found the follow image by Andrew Probert.


Of special note is what he says about the Shuttle Bay and the Impulse Engines in the top part of the image, and in the bottom image you can see open Cargo Bays.

I will add the slit for the Impulse Engines when I work on that part.  But lets talk about the Shuttle Bay.  We area talking about this part here at the back.


On thing jumps out at me about the Shuttle Bay, is the fact it is undersized.  I saw a comment someplace were it was said the Shuttle Bay was an after thought, hence why its small.

If you compare the spacing of the lights on the ship that represent the space between decks, the Cargo Bay Openings are about eight decks high, yet the Shuttle Bay is barely one deck. Naturally it depends on how you define the spacing between decks. But I think when you see even the smallest shuttle bay on the Next Generation Enterprise, its at least two decks in height. So I will remodel this one to be about two decks as well.  Make it stand out better that's for sure.

One last thing, I am also a gamer.  One of the games I like playing is Star Trek Online, they have this warbird in game as well.  But something they have done is added strobes to the warbird.  Now this is nowhere accurate but is sure looks cool.  So yup I am going to add them as well.

So, with all that said, its time to actually start on this model.  I will cut the molding tabs off, give it a good washing and start planning the Suttlebay changes.


Slow getting started again

Its been a while since I posted here.  Sorry, I have 15 million interests and it takes a while to get back into the swing of things sometime...